
This post contains affiliate links. As an Amazon Associate I earn from qualifying purchases
Table of Contents
What Cut of Meat for Pulled Pork
Who doesn’t love the taste and aroma of pulled pork? For sure you want to learn the basics on how to make delicious and the best-tasting pulled pork. We’ll obviously start with picking the right cut of meat to be used, before moving on to one of our favorite recipes.
What Is Pulled Pork?
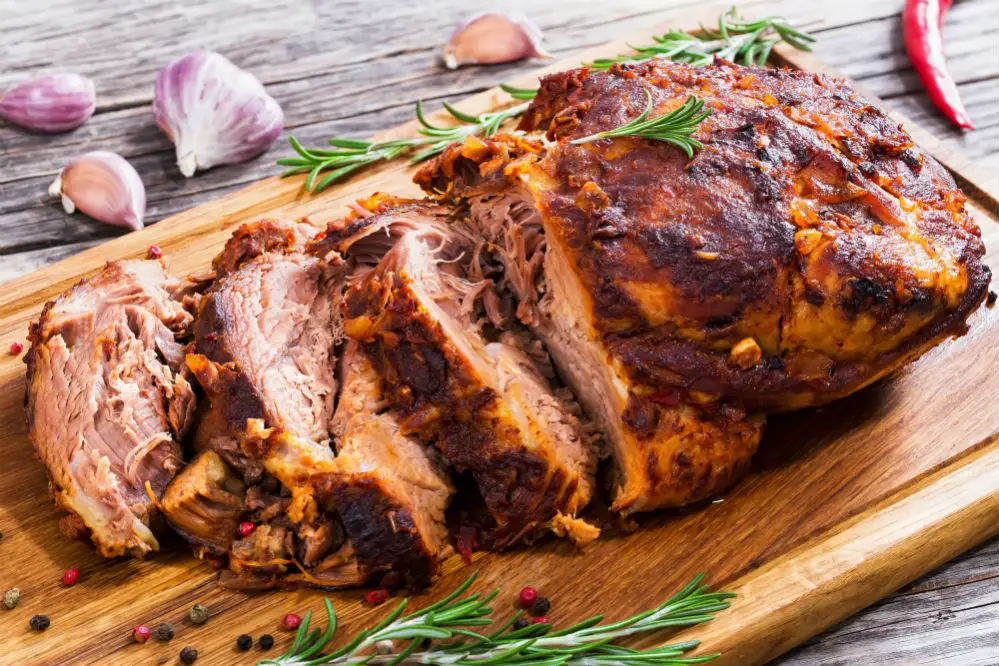
Pulled pork is a delicious culinary dish that originated in the Southern United States. It is a tender, fatty, and flavorful dish that uses shredded barbecued pork as the main ingredient.
It is said that smoking of the pork over low heat for a long period is required in making sensational pulled pork. However, others who are not fond of smoke or outside barbecuing opt to use a slow cooker as an indoor substitute. The cooked meat is then shredded manually and mixed with the sauce before serving on a piece of bread or rolled as a sandwich.
How to Make the Perfect Pulled Pork?
Below are the basic steps for making the best and deliciously tasting pulled pork, from choosing the meat to seasoning, slow cooking, and serving, and anything in between. We’re going to choose the smoked method here but of course, it can be adapted.
- Choose the Cut of Meat
The first step in making this dish is to decide what cut of meat for pulled pork to use. This can be made from any fatty pork roast or a whole pig. Keep in mind that for this recipe you will be cooking very slowly so a tougher pork cut will still enable you to serve a great meal confidently. Still, it is important to get the right cut of meat for your pulled pork.
What Cut of Meat for Pulled Pork?
The ideal cut used in making pulled pork is the shoulder. This pertains to the entire front leg and shoulder of the hog and typically weighs between 12 to 16 pounds. It contains optimum fat content and connective tissues that don’t dry quickly. However, this cut should be cooked slowly to allow proper protein breakdown giving your meat a flavorful and tender taste.
The pork shoulder is typically cut into two parts: Boston Butt and Picnic Roast. They are usually available at the local store and individually weigh between 6 to 8 pounds. The Picnic Roast cut can come with or without the bone and is more like an unprepared ham that works perfectly for pulled pork. On the other hand, the Boston Butt cut has fewer bones and is the preferred cut for cooking due to their more uniform and rectangular shape that is easier to handle.
No matter what cut–whole shoulder, Boston butt, or picnic roast, you choose, be sure that they have a good quantity of fat to make the smoking process easier.
- Prepare the Meat
Once the meat has been chosen, trim off any loose skin and fat as these won’t help the pork and will just tend to get in the way. Sections of fat should be no more than between a ¼ to a ½ inch in thickness to even out the cooking time. Leaving the fat very thick will also increase the cooking time. Another factor with this is that it makes it easier to for the smoke to penetrate and flavor the meat better.
- Add the Rub
A typically pulled pork rub is made from brown sugar, salt, paprika, pepper, and herbs. When the meat is ready, gently sprinkle and massage the rub over the meat surface to add flavor to the meat while it undergoes smoking. Make sure that the meat is evenly covered. Let the rub sit and work deep into the meat for an hour until a moist paste is formed on the surface. This will help in producing the crusty exterior known as bark.
Wrapping of the seasoned meat in a plastic wrap and placing it in the refrigerator overnight can also be done for a stronger flavor. However, you must ensure that you take it out of the fridge early enough to let the pork reach room temperature before starting to cook it, as the outside might burn.
- Smoke the Meat
The traditional woods used in smoking pulled pork are hickory and oak. You can also use other mild woods as long as it gives an even temperature to about 100 degrees Celsius. A sudden increase in the temperature will make the meat tough.
Smoking the pork will run for a long time, about 1.5 hours per pound seems to be a good guideline but it can take even longer so don’t try and time this dish to the minute. Be sure to get it low and slow. You can remove the pork once it reaches an internal temperature of 75 degrees Celsius, however, it won’t be tender. You should continue the smoking until the meat is easily shredded with a fork or meat shredder, at a temperature of 90-95 degrees Celsius.
Alternative cooking methods can be used if you have trouble in smoking for longer hours. You can wrap the pork in a foil and place it in the oven set at 100 degrees Celsius until it is done.
- Pull the Meat
After the smoking is done, remove the meat from the smoker and let it sit for about 30 – 45 minutes. At this point, the meat is so tender that you can simply pull it apart with your hands. Start to pull the meat using a fork or meat shredder. Place the shredded meat in a pot over low heat to keep it warm. Add simple vinegar sauce to the mixture for a more authentic flavor.
You can also coat the meat using a sauce made from the combination of cayenne, paprika, and apple cider. Barbecue sauce can also be used with vinegar to neutralize the sweet taste. Serve the pulled pork on a plate or a bun depending on your taste.
Final Thoughts
Now that you know the basic steps in cooking pulled pork, you can now make your own and impress your family and friends. Be sure to choose the best cut of meat and follow the required smoking settings to ensure tasty and juicy meats.
Try experimenting with the rubs and the sauces that you will use in your pulled meats. This will greatly depend on your preferences and taste. And if anything goes wrong, don’t blame us, you can always opt with the traditional pulled pork recipe that you knew while growing up.